
Water Softener Salt Bridge: How to Find and Break It
Content updated
Sources last checked
A water softener salt bridge is a hard crust of salt that forms across the brine tank with an empty space underneath. The salt above it never touches the water below, so no brine forms, the resin is not recharged, and hard water comes back even though the tank looks full.
If your manual permits this check, mark a blunt broom handle at the height of the tank rim and gently probe the salt. A hard stop well before the mark may indicate a bridge; gently break the crust in several places without forcing the handle against the tank. Follow the manual's regeneration instructions after clearing a confirmed bridge, then retest. Never use a sharp tool or strike the tank.
Bridge rule: Blunt tool, gentle pressure, several spots, and a regeneration afterward. If the tank is cracked, leaking or wet near the power supply, stop and call for service instead.
Signs of a salt bridge
A bridge usually shows up as a mismatch between the salt and the water:
- your water feels hard again (soap does not lather, spots on glasses) while the tank still looks full;
- the salt level has not dropped for weeks even though the controller shows regenerations completing;
- the top of the salt looks crusted or cemented together instead of loose;
- when you look down the brinewell with a flashlight, the water sits well below the salt.
The Whirlpool WHES48 manual points out why this is easy to miss: when the tank is full, a bridge can sit underneath a layer of loose salt, so the surface looks normal. The manual describes gentle probing to check for a hidden hard layer; use that method only where the exact model permits it.
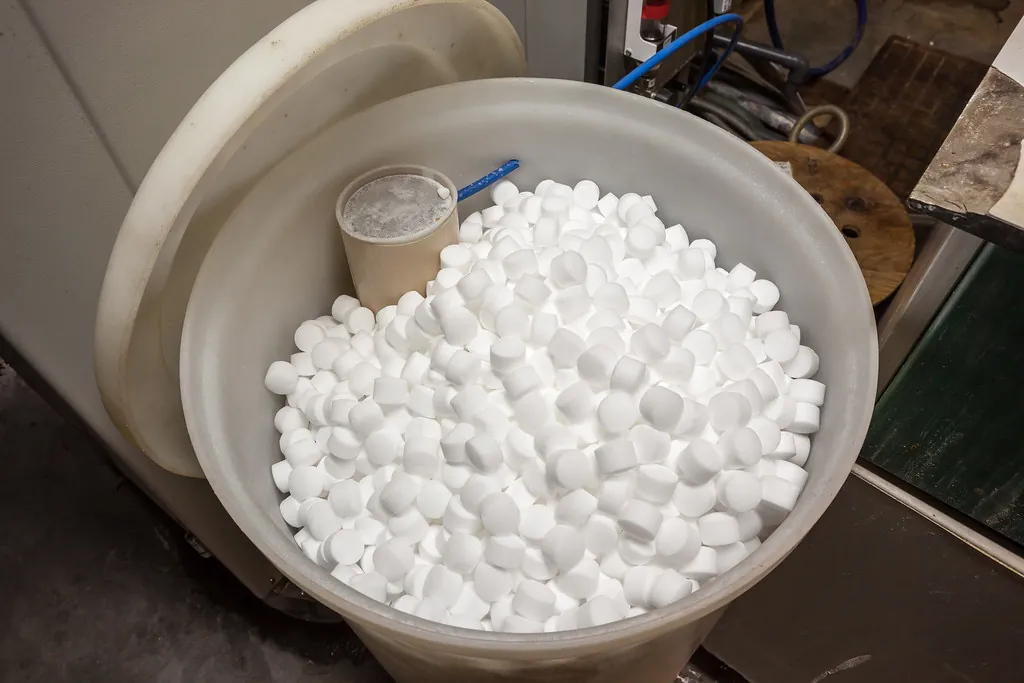
Check for a bridge with a broom handle
This is the procedure Whirlpool prints for its WHES48 and WHES40/44 softeners. Use it only where your exact manual permits this access and method. An accessible lid alone does not establish that the procedure fits the tank.
- Get a broom handle or similar blunt pole. Wood or a rounded plastic handle is fine. Nothing pointed.
- Mark it. Stand the handle on the floor next to the softener and make a pencil mark level with the rim of the salt tank. That mark tells you how deep the handle is once it is in the tank.
- Push it straight down. Lift the salt lid and gently push the handle straight down into the salt, away from the brinewell (the narrow tube inside the tank).
- Read the result. If the handle meets something hard before the pencil mark reaches the top of the tank, you have most likely found a bridge. If it slides down until the mark is close to the rim, the salt is loose to the bottom and a bridge is unlikely.
If you have both loose salt and a hard layer lower down, the hard layer is the bridge. Try two or three spots before deciding.
Break the bridge
Whirlpool's instruction is short: gently push into the bridge in several places to break it. In practice:
- Push down firmly but steadily with the same handle, in several spots across the crust, until it gives way and the pieces drop into the water.
- Break big chunks into smaller ones so they can dissolve; there is no need to remove them.
- Keep clear of the brinewell and any float or tubing inside it.
Two things the manual rules out, and why:
- No sharp or pointed tools (knives, screwdrivers, metal rods). They can puncture the brine tank.
- No pounding on the outside of the tank. It can crack the tank and does not reach the crust anyway.
If the crust will not budge, EPA's water softener guide says hot water can help loosen a persistent bridge. For salt caked around the brinewell openings, it describes pouring about a gallon of hot tap water into the brine tank, waiting about 10 minutes, then breaking up the salt with the broom handle. Use tap water, not boiling water, and skip this step if your manual advises against adding water to the brine tank.
Get the softener working again
While the bridge was in place, the resin was not being recharged, so your softener is probably out of capacity. Breaking the crust does not fix that until the next regeneration runs.
- Give the salt time, then regenerate. The Pentair 5600SXT manual says to wait about two hours after loosening the salt before starting a regeneration, so fresh brine can form. On the WHES48 this is the Recharge button, then Recharge Now. Other controllers call it "regen now" or "manual regeneration"; see our guide to starting a manual regeneration.
- Let it finish. Whirlpool puts a manual recharge on the WHES40/44 at about two hours; your manual gives the time for your model.
- Record brine draw during the brine stage, only if the manual permits that observation. The WHES48 procedure looks for a noticeable drop at that stage. A final level after the cycle is not equivalent evidence because refill timing differs by model.
- Retest the water. The next day, test a cold softened tap with test strips or a drop-count kit, using the same method you used before. See how to test water hardness before and after a softener.
- Run a second regeneration if the water is still hard. Pentair notes that a second recharge may be needed to fully restore the resin.
- Top up the salt if needed, keeping to the fill level in the next section.
If the salt level still does not move over the following week, or the water stays hard after a completed regeneration, the bridge was not the only problem. Go to why a softener is not using salt next.
Why bridges form and how to prevent them
Whirlpool names the two usual causes: high humidity and the wrong kind of salt. Both make the top layer of salt absorb moisture and cement together.
What helps:
- Use the right salt. Whirlpool recommends nugget, pellet or coarse solar salt with less than 1% impurities, and advises against rock salt, block salt, granulated or table salt, and ice-melting salt.
- Keep the tank less full in humid rooms. The same manuals say that in humid areas it is best to keep the salt level lower and refill more often. Pentair's 5600SXT manual is more specific: it says pellets may bridge if the tank is filled more than half full, and EPA warns that the weight of a tank filled to the top can cause bridging. Refilling to about half rather than to the rim follows all three.
- Check the salt on a schedule. EPA suggests filling the tank about half full, checking every 4 to 6 weeks, adding salt once the salt level falls below the water level, and never letting it drop below one-quarter full. Until you know your usage, Whirlpool suggests checking every two or three weeks. EPA WaterSense also lists checking the salt level and watching for bridges as routine maintenance.
- Break up any crust early. A thin crust breaks easily with the broom handle; a thick one that has been building for months is harder work.
- Keep the lid on. It keeps out room moisture and debris.
- Let the softener regenerate on demand. EPA recommends having regeneration set from your incoming hardness and water use rather than a fixed calendar, so the salt is actually used and turned over.
A few lines in the maintenance log (date, pounds added, salt type, whether you found a crust) show quickly whether a new salt brand or a damp season is the trigger.
When to stop and call for service
Stop, leave the salt alone, and contact the manufacturer or a water-treatment technician if you find any of these:
- a cracked, bulging or leaning brine tank, or water on the floor around it;
- water near the plug, transformer or controller;
- a damaged brinewell, float or brine line;
- a regeneration that seems stuck, or water running to the drain nonstop;
- a bridge that comes back within a few weeks even with pellet salt and a lower fill level.
For a service visit, bring the model number, the salt you use, when you last found a crust, and before-and-after hardness results. The service checklist lists what a technician will ask for.
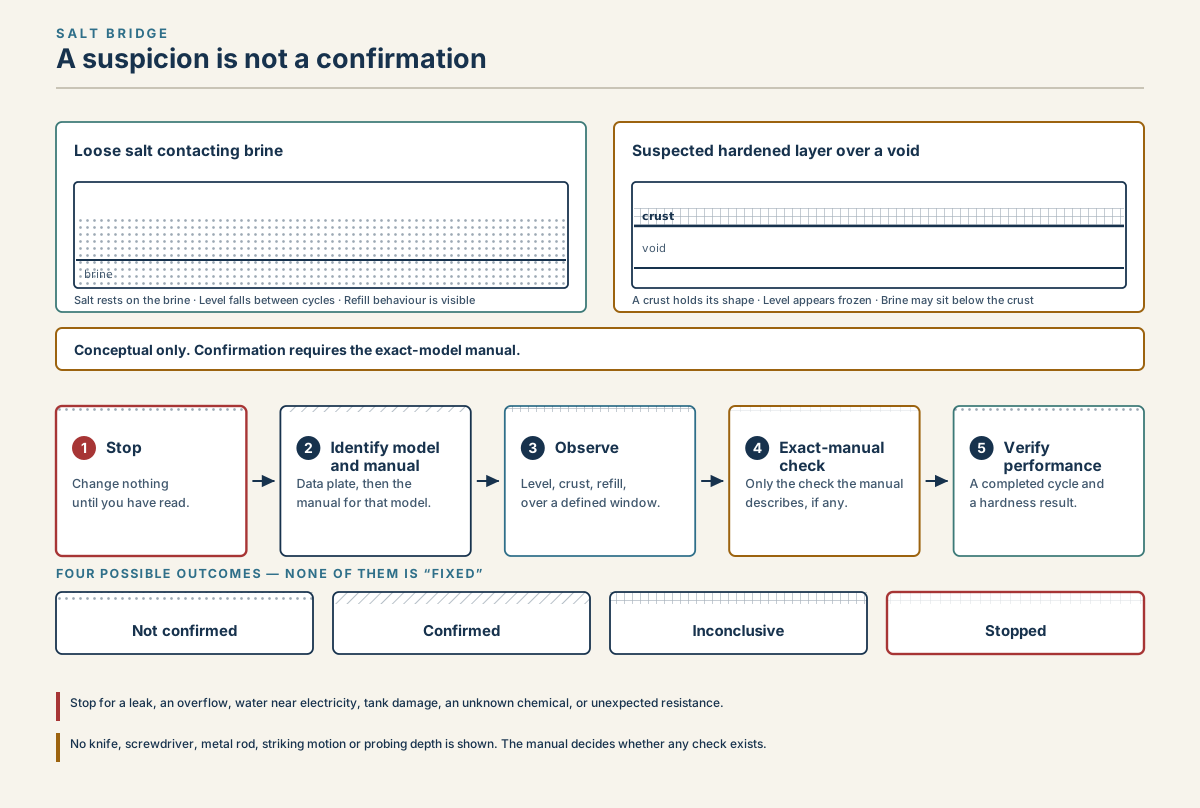
Five-step check for a suspected water softener salt bridge: safety, model and manual, a blunt-handle probe, a gentle break with regeneration, and a hardness retest.
Read diagram in text
- SALT BRIDGE
- Find it, break it gently, then regenerate
- Loose salt contacting brine
- brine
- Salt rests on the brine
- Level falls between cycles
- Refill behaviour is visible
- Salt rests on the brine · Level falls between cycles · Refill behaviour is visible
- Suspected hardened layer over a void
- crust
- void
- A crust holds its shape
- Level appears frozen
- Brine may sit below the crust
- A crust holds its shape · Level appears frozen · Brine may sit below the crust
- A blunt handle that hits a hard layer well above the tank floor usually means a bridge.
- 1
- Check safety
- No leak, crack or
- water near power.
- 2
- Identify model
- and manual
- Data plate, then the
- manual for that model.
- 3
- Probe
- Marked blunt handle,
- two or three spots.
- 4
- Break and
- regenerate
- Gentle pushes; wait about
- 2 hours, then recharge.
- 5
- Retest
- hardness
- Cold softened tap,
- same test as before.
- WHAT THE HANDLE TELLS YOU
- No bridge found
- Bridge found
- Unclear: try more spots
- Stopped: call service
- Stop for a leak, an overflow, water near electricity, a cracked or bulging tank, or a damaged brinewell.
- Use a blunt broom handle only: no knife, screwdriver or metal rod, and never strike the tank.
Bridge or something else
A few conditions look like a bridge but need a different fix:
| What you see | Possible explanation to check | What to do |
|---|---|---|
| Handle goes to the bottom, salt level not dropping | Softener not regenerating, or not drawing brine | Check the not-regenerating guide |
| Salt hardened around the brinewell tube | Salt clogging, which blocks water moving between the tanks | Use EPA's hot-water method above, then regenerate |
| Thick sludge or a solid mass at the very bottom | Salt "mushing", which is different from a bridge | Let the salt run down and clean the brine tank per your manual, or call for service |
| Salt dropping fast, water still hard | Settings or demand problem | Review the hardness setting |
| Salt level drops normally, water hard only sometimes | Bypass valve partly open or high peak demand | Check the bypass position and your water use |
The NSF/ANSI 44 technical summary shows how many parts of a softener affect performance: capacity, rinse, brine-system accuracy and structural integrity. A bridge is one possible cause of hard water. If clearing it and completing the supported recovery procedure do not restore the expected result, investigate the other paths.
Frequently asked questions
How do I know if my water softener has a salt bridge?
Push a marked broom handle straight down into the salt. If it hits something hard before the mark reaches the tank rim, you most likely have a bridge. Other signs are hard water while the tank looks full, a salt level that stops dropping, and a crusted surface. A full tank can hide a bridge under loose salt.
Can I use a broom handle to break a salt bridge?
Yes. Whirlpool's manuals describe exactly that: gently push a broom handle or similar blunt tool into the crust in several places until it breaks. Do not use anything sharp or pointed, which can puncture the tank, and do not hit the outside of the tank. If your model's manual describes another method, follow it instead.
Will breaking a bridge fix hard water immediately?
Not right away. The resin went without brine while the bridge was there, so it needs a regeneration to recharge. Start a manual regeneration after breaking the crust, let it finish, then retest a softened tap the next day. If the water is still hard, check brine draw and settings next.
How do I stop salt bridges from coming back?
Use pellet salt made for softeners, not rock, road or table salt. Fill the tank only about half full, as EPA and Pentair advise, and refill more often in a humid basement or garage. Check the salt every few weeks, keep the lid on, and break any light crust early.
Sources
Sources were consulted on the dates shown. Brine tank designs differ by model, so confirm the steps against your current manual.
- Whirlpool Water Solutions, Whirlpool WHES48 manual; consulted September 24, 2026.
- Whirlpool Water Solutions, Whirlpool WHES40/44 manual; consulted September 24, 2026.
- U.S. Environmental Protection Agency WaterSense, Soften Water Without Wasting It: Guide to Selecting and Maintaining a Water-Efficient Water Softener, May 2026; consulted September 24, 2026.
- U.S. Environmental Protection Agency WaterSense, Home Maintenance — Water Softeners, updated June 16, 2026; consulted August 27, 2026.
- U.S. Environmental Protection Agency WaterSense, Cation Exchange Water Softeners, updated May 8, 2026; consulted August 27, 2026.
- Pentair, Pentair 5600SXT manual; consulted September 24, 2026.
- NSF, Technical Requirements of NSF/ANSI 44: Cation Exchange Water Softeners; consulted August 27, 2026.
- Whirlpool Water Solutions, Whirlpool Water Softener & Filtration System Manuals; consulted August 27, 2026.
Before you continue
Every instruction here refers to the exact model on your unit's data plate. There is no universal button sequence: check the manual for your model before acting.